Archives for posts with tag: Garlic

IMG_6493

Any dish that ends “…with ginger and chili” I am predisposed to like. It’s kind of my current favorite flavor profile. I generally like heat over sweet, and there is something medicinal, healing, about the combination. When I can remember to, I like to start my mornings steeping ginger and chili in hot water, sometimes with a little bit of fresh squeezed lemon, and if I’m feeling a stuffy nose coming on, a tiny bit of honey.

So when I stumbled upon a recipe for a spicy butternut squash soup I perused the ingredient list and liked what I saw: coconut milk, fresh ginger, fresh chili, cilantro, turmeric. This was a recipe for October, for crisp weather and fending off colds. It is warmth in a bowl.

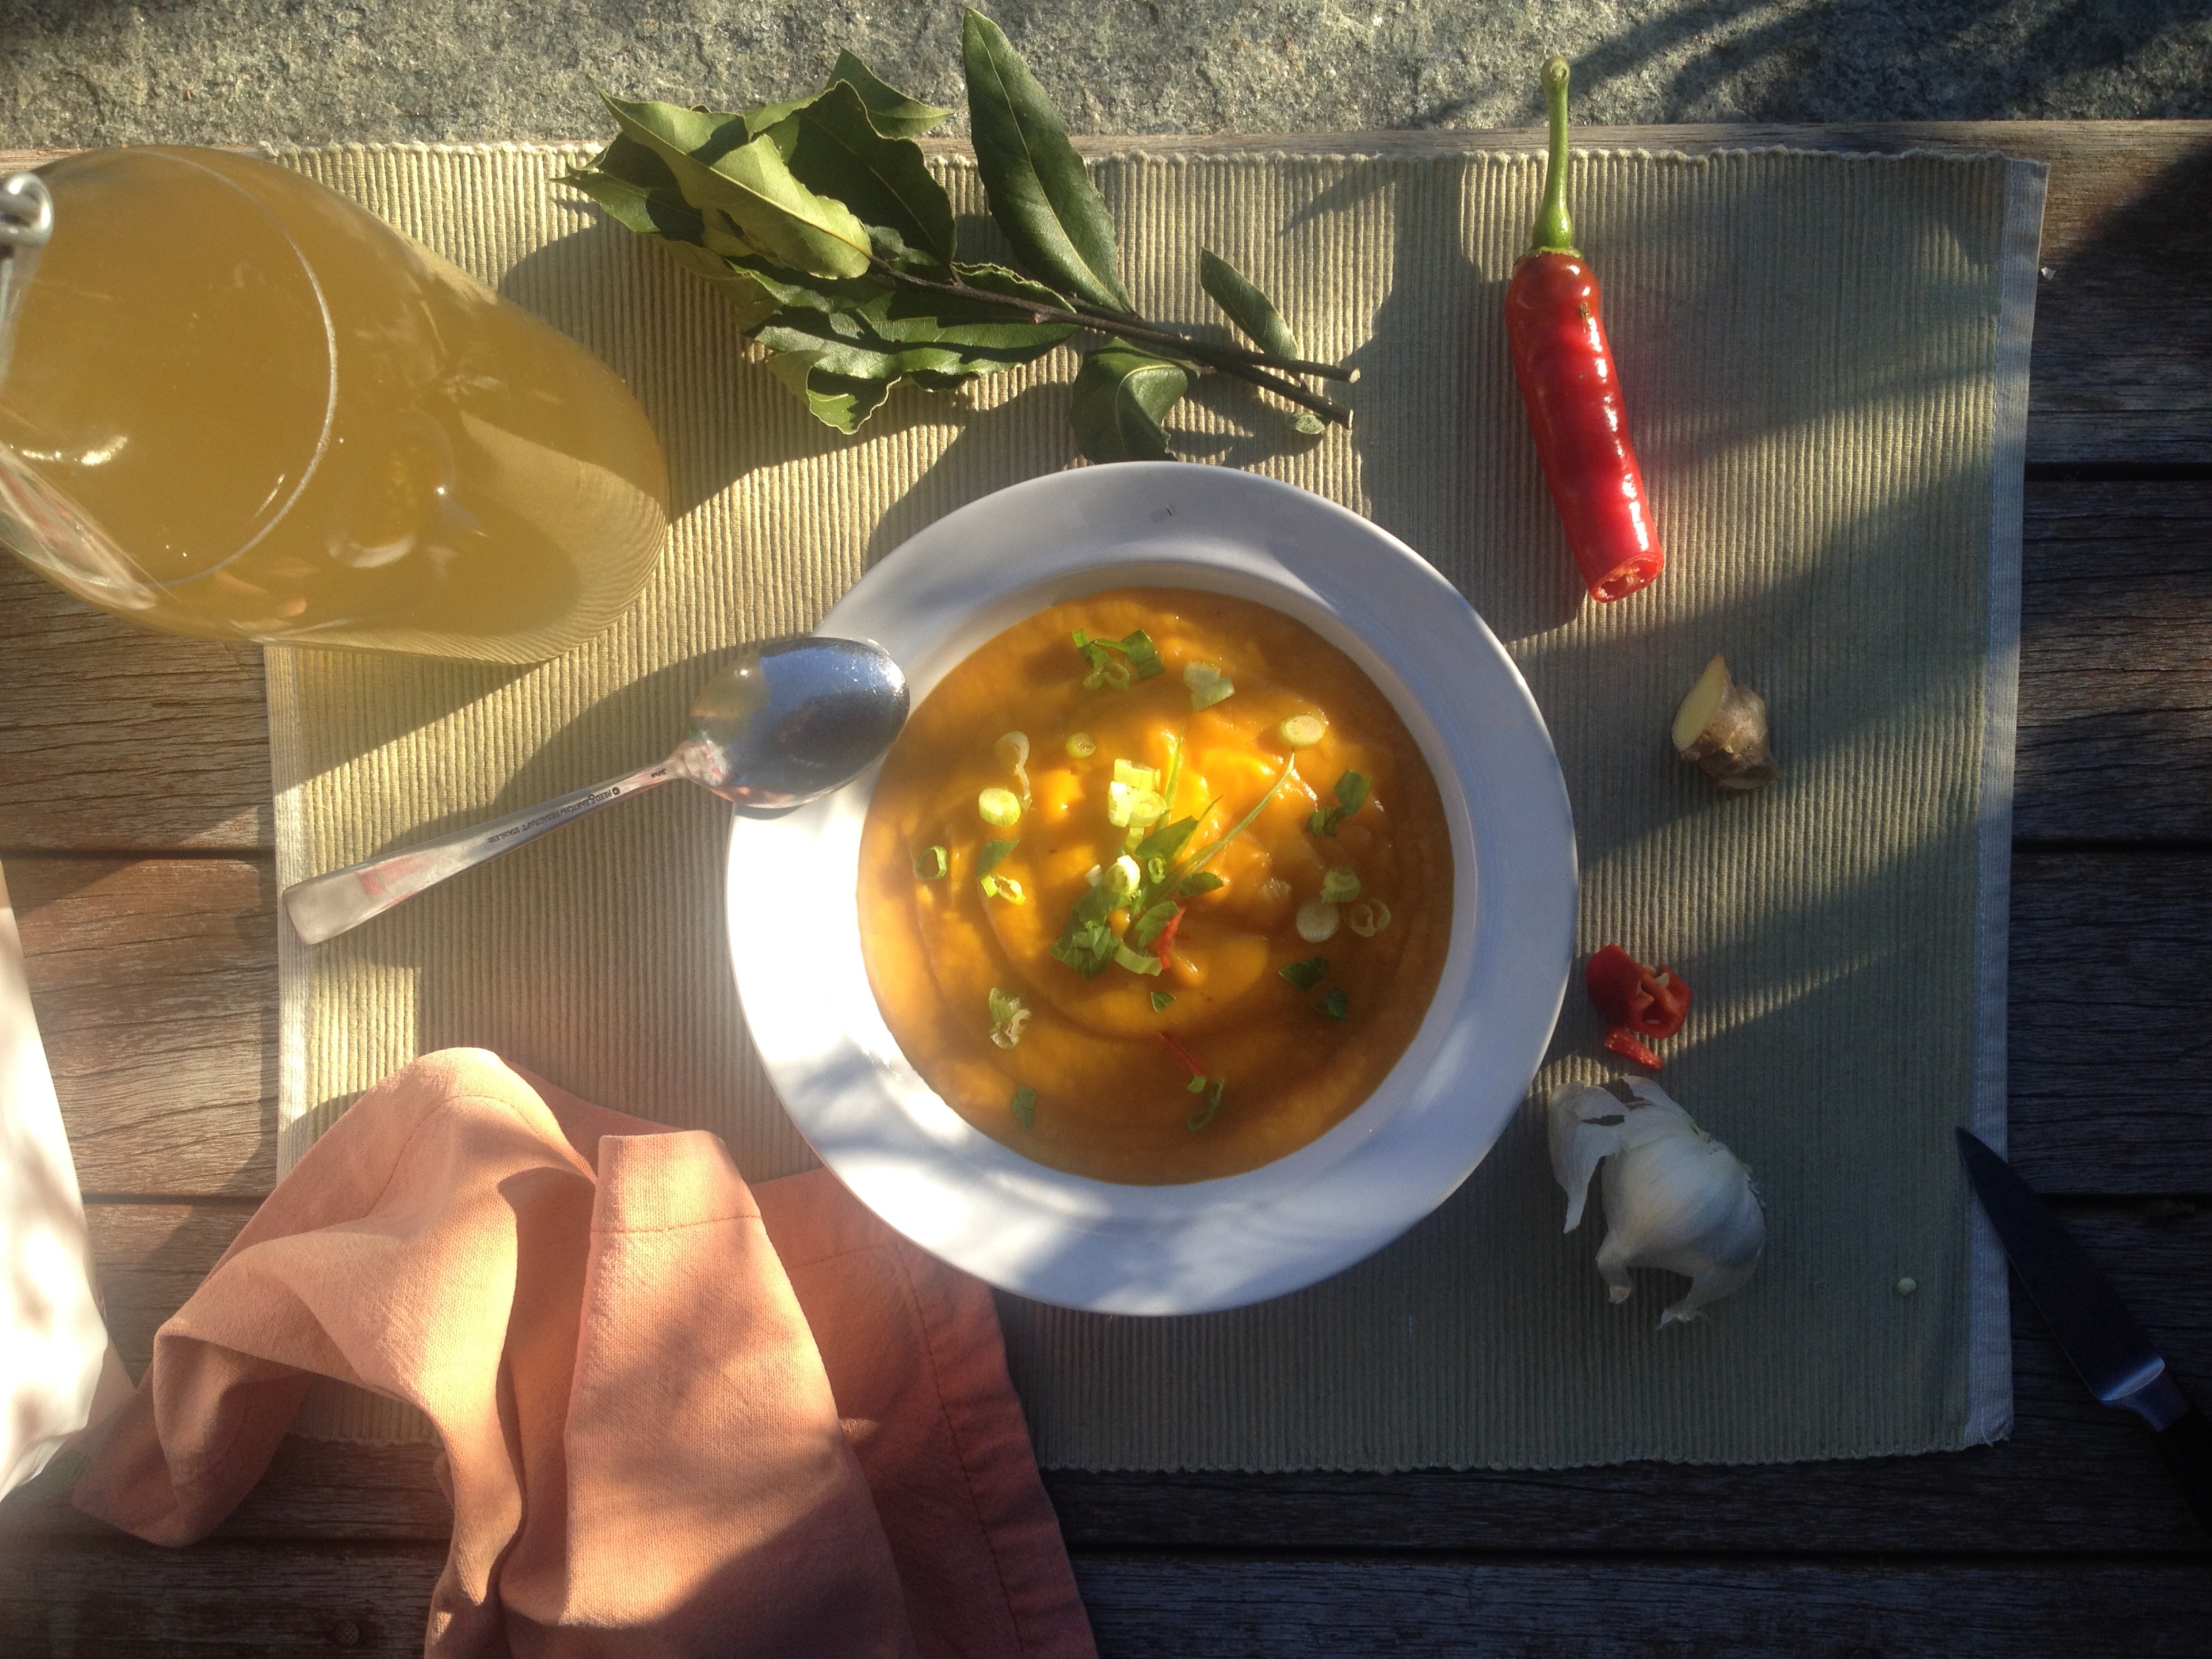
I’m in Vermont for a few days watching over a two-month-old kitten named Sam—short for Sammy Davis Jr., naturally. While born feral and therefore fearful of humans, she surprised me this morning when I woke to discover her resting peacefully on my chest. Up, down, with my breath. I picked long red chili peppers with my stepmother from her garden before she headed out of town, putting the better part of one to good use in this recipe. Now I just need to find something to do with all the Swiss chard, white eggplant, and green tomatoes we picked. In the meantime…

IMG_6484

Butternut Squash Soup with Ginger and Chili
adapted from Brooklyn Vegetarian

2 tablespoons coconut oil (olive oil works well too)
1 medium onion, diced
Knob of fresh ginger, approx. 1 inch, peeled and minced
3 cloves of garlic, minced
Fresh red chili pepper, minced, to taste (I used a piece 2 inches long)
1 teaspoon cumin
1/2 teaspoon turmeric
1 carrot, chopped
1 stalk celery, chopped
1 medium to large butternut squash, peeled, seeded, and cubed
4 cups vegetable broth
1/2 cup coconut milk
Salt and pepper, to taste
Parsley or cilantro, to garnish
Scallions, to garnish

In a large saucepan heat the oil on medium heat. Add the onion and sauté for about 5 minutes, or until it turns translucent. Add the ginger, garlic, and chili and sauté for about 1 minute, then add the cumin and turmeric. Stir, then add the carrot and celery and sauté for several minutes until they begin to soften. If the pan gets too dry you can add a spoonful or two of water, so the onions don’t stick. Add the squash, broth, and coconut milk, season with salt and pepper, and slowly bring to just before the boil. Turn the heat down and simmer until the squash is cooked through, about 20 minutes. Allow the soup to cool some before transferring to a blender or food processor. Blend until smooth, in batches if necessary. You can reheat the soup in its pan before serving if you’d like. Garnish the soup with sliced scallions and parsley or cilantro.

IMG_6475 IMG_6447

Pasta-Fagioli-14

This is the first in a series of guest blog posts. This week I’m delighted to introduce Jill Ulicneya Brooklyn-based photographer and food lover. You can find her latest photos and drawings at jillieu.tumblr.com and at Instagram via @jillieu.

There used to be a wonderful Italian cafe on Bleecker Street named Scali, which I would frequent for its incredible vegetarian pasta e fagioli soup. Six dollars would get me a generous serving of steaming hearty tomato, white bean, and pasta goodness along with a crusty piece of bread. Since they closed in 2012, I haven’t found a better lunch deal nor have I found a pasta e fagioli that compares to theirs.

Now that winter is here in New York, I’ve been dreaming about a reunion with this soup. After researching, I found countless methods for pasta e fagioli, but nothing that sounded quite like Scali’s version. This is my attempt to recreate my old favorite.

Note: many recipes suggest cooking the pasta in the soup. I chose to cook it separately because I didn’t want the pasta to absorb too much liquid since I prefer a brothy soup.

Pasta e Fagioli

40 minutes
Serves 6

Ingredients

2 tablespoons olive oil
1 large onion chopped
4 cloves garlic chopped
1 medium carrot chopped
1 small rib of celery chopped
1 bay leaf
1 28-ounce can of whole peeled tomatoes
4 cups vegetable stock
1 teaspoon crushed red pepper flakes
1 teaspoon dried Italian parsley
5 fresh basil leaves torn
1 15-ounce can of white beans
12 ounces small pasta, like malloreddus or ditalini
Parmesan (optional)
Salt
Pepper

Soup Directions

Heat a large pot with two tablespoons olive oil.
Add onion, garlic, carrot, celery and bay leaf to the pot. Season with salt and pepper and cook for five minutes on medium heat or until onion is tender.
Add canned tomatoes (do not drain), vegetable stock, red pepper flakes and dried parsley and stir to combine.
Bring to a boil over high heat, stirring occasionally.
Remove bay leaf (do not discard) and use immersion blender to blend ingredients to preferred smoothness.
Return bay leaf back to the mixture and add basil leaves and white beans.
Cover and simmer for 10 minutes.

Pasta Directions

Fill a medium pot with water and set to high heat.
When the water begins to boil, “salt it like the sea” as my pasta nerd friend says.
Add the pasta and cook until pasta reaches preferred state
Drain the pasta.

To serve, place pasta in individual bowls and ladle the soup on top.
Grate some fresh parmesan over the soup and enjoy!

Pasta-Fagioli-3

I came home from Vermont on Labor Day with a weighty bag of small plum-like tomatoes from my stepmother’s garden. I was housesitting for her and my father and part of my laborious duties included picking the ripe fruits from their vines. While the Sun Golds burst with the flavors of sun and summer, these more Roma-like tomatoes seemed better suited to gazpacho or a sauce.

The bag sat on my counter in Brooklyn for most of last week until it occurred to me to roast them, concentrating their flavors for a sweeter, more flavorful punch. I like raw tomatoes, I do. They’re one of August and September’s exquisite pleasures: slicing the juicy fruit, whether beefsteak or heirloom, seeds spilling over the edge of the cutting board. Layered with good buffalo mozzarella and basil, or just biting into one like a peach. But I find, after a while, I want my tomatoes cooked. I want the tastes condensed, the flavors warm. Maybe it’s just summer turning into fall.

So I decided I needed more tomatoes. I swung by my local farmer’s market Saturday after the tornado/tornahdo left Brooklyn and the sun came out blazing. A stand had a $1/lb bin of bruised tomatoes that needed a home – I was more than happy to adopt these forsaken ones. I lugged six pounds home for six bucks.

Once home I sliced all the tomatoes and arranged on a baking sheet, drizzling olive oil and salt on top. I roasted them in a 225 degree oven for one hour, a little more, turning once, until they were shriveled and syrupy. These are great to eat just like this – tossed with pasta, or on toast, in a salad, or mixed with rice. But I thought marinated in olive oil with the basil and garlic I brought home from Vermont would be even better. So quite unintentionally I found myself stuffing the roasted tomatoes into glass Ball jars and sealing their lids in baths of boiling water.

A friend came by and said, “you’re canning!” And so I was. Sort of. But I think of it more like cheating – preserving the rich flavors of summer without spending days on a factory line in my kitchen. It took all of a couple of hours to fill four Ball jars this weekend. I know that won’t get me through the winter, let alone fall. September? Maybe.

Roasted, marinated tomatoes, for fall

Tomatoes, any variety, the cheaper/uglier the better
Olive oil
Garlic
Salt
Chili peppers, optional
Basil, optional

1. Slice the tomatoes into wedges (unless very small in which case halve them). Arrange on a baking sheet and drizzle with olive oil and salt. Bake at 225 F for at least one hour, and up to one and a half hours.

2. Cool completely before transferring to a Ball or Mason jar with a sealing lid. Add a few cloves of crushed garlic to each jar, also adding basil and small dried peppers if you’d like. I add a dash more of Maldon salt. Pour olive oil in the jar until the tomatoes are coated and marinating in the oil.

3. Bring a large pot of water to boil. Turn down the heat to a vigorous simmer and add your jars with the lids on tight. Let sit in the simmering water for at least five minutes, or until the jars are sealed and the lid doesn’t pop when you push on the center.

%d bloggers like this: