IMG_3193

I was up in Vermont this past weekend extending my birthday celebrations with old and new friends and, of course, delicious food. I hesitated before posting because I didn’t get the best food shots (cooking in the evening) but one dish in particular was so tasty I wanted to share. AND it makes use of those preserved lemons you made after reading my recent post. It’s so addictive, and easy to make, this will go into my regular rotation.

IMG_3218

March in Vermont. You can hardly call it spring. It’s either mud season or maple sugaring season, depending on how charitable you feel. These are some shots taken in the surroundings of my parents’ house, including the not-quite-frozen pond and hardy grasses that survived the winter. Check out the cerulean sky!

IMG_3220

One reason I haven’t posted too much lately — aside from concussion recovery — has been wanting to focus more on vegan and vegetarian food and less on meat-centered dishes, not that that was ever my focus. A goal of mine this year is to move more gradually in the direction of an animal-free diet. I’m about 80% there already but it’s that last 20% I find challenging. This spicy carrot salad is vegan (if you omit the optional Greek yogurt) and goes great with a number of main dishes.

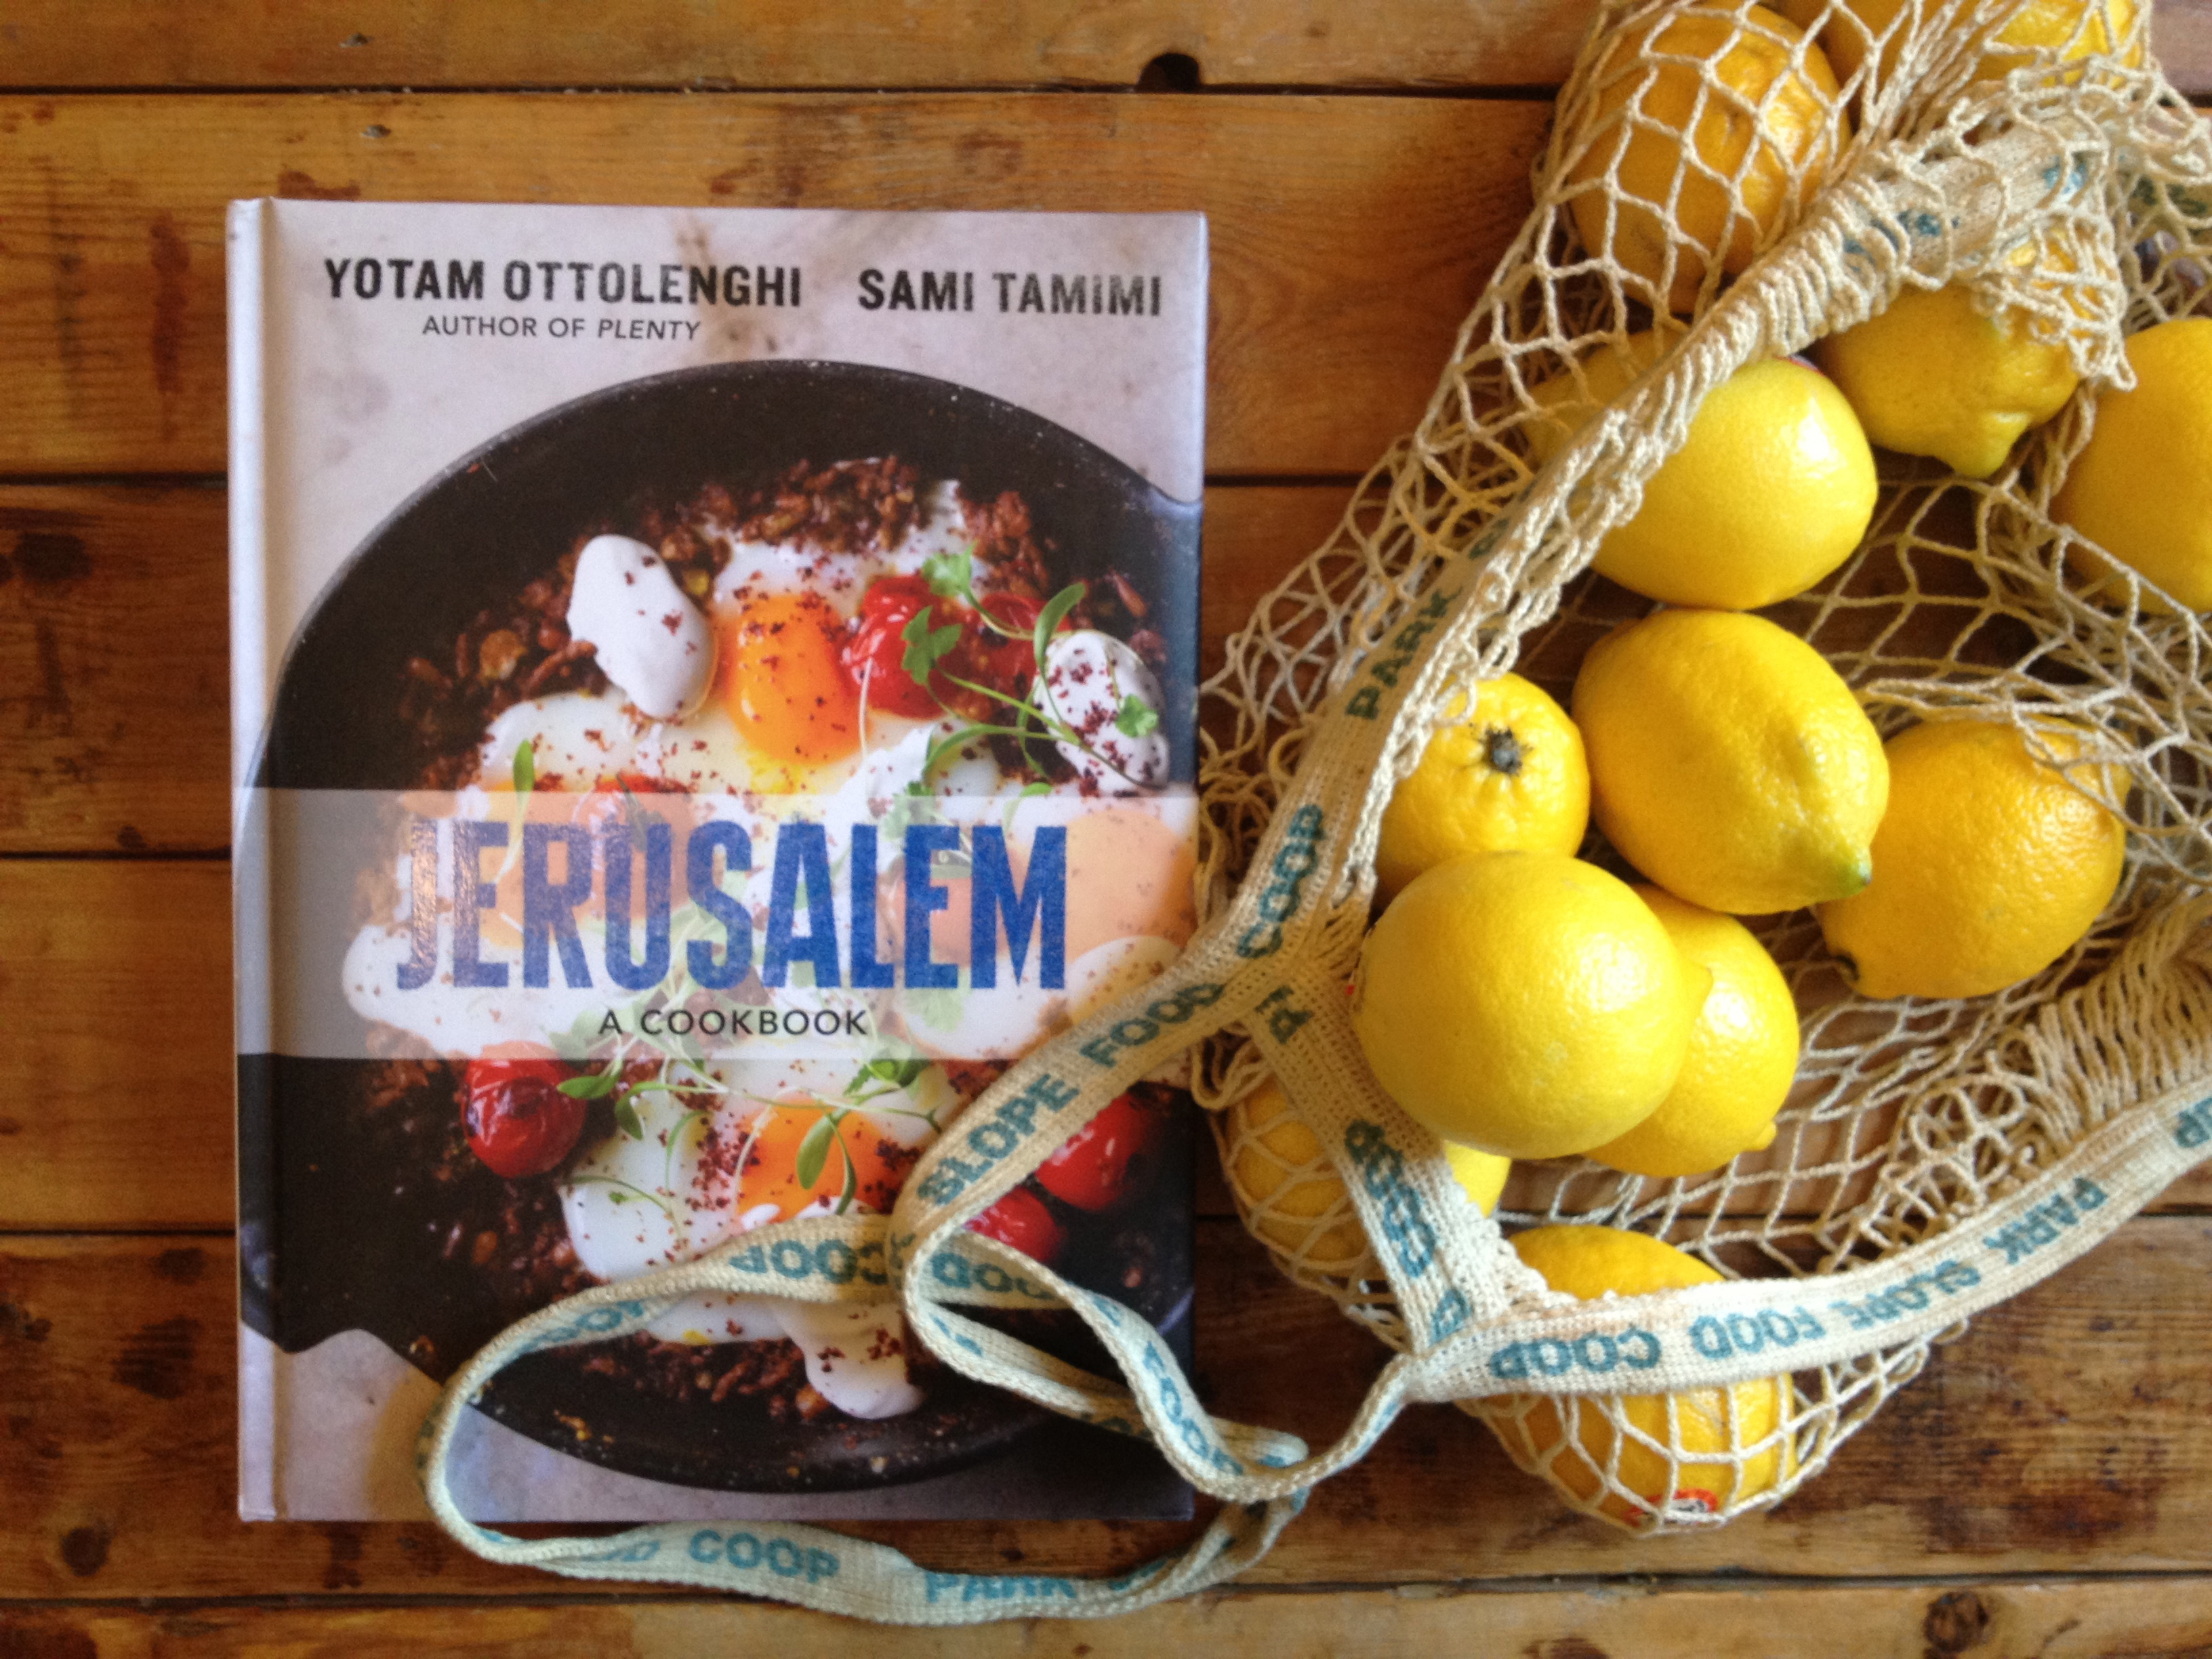
This weekend I served it with a very non-vegan leg of lamb, the recipe of which came from the cookbook Jerusalem. The meat was from Duclos’s Sheep Farm in Weybridge, which I mentioned here last summer. From “mostly food” to “mostly vegan!” It’s a gradual process…

Ok, carrots. I love this dish because it’s richness comes from the onion and spices and not from butter or dairy or lots of oil. You can adjust the level of spiciness to your liking, but the recipe below is fairly mild. You could serve this with a warm freekah salad, which I should probably post about next. You cook the freekah just as you would brown rice and add to it caramelized shallots, scallions, and lots of fresh parsley. Dig in.

IMG_3228

Spicy carrot salad
Adapted from Plenty

Serves 4–6

2 lbs carrots
1/3 c olive oil
1 medium onion, finely chopped
1 tsp maple syrup
3 garlic cloves, crushed
1 medium jalapeño, finely chopped
1 scallion, green and white parts, finely chopped
1/8 tsp ground cloves
1/4 tsp ground ginger
1/2 tsp ground coriander
3/4 tsp ground cinnamon
1 tsp sweet paprika
1 tsp ground cumin
1 tbsp white wine vinegar
2 tbsp chopped preserved lemon (recipe here)
salt
2 1/2 c cilantro leaves, roughly chopped
1/2 c Greek yogurt, optional

Peel the carrots and cut them into semicircles 1/2 inch thick. Place in a large saucepan covered by cold salted water and bring to a boil. Turn down the heat and simmer for about 10 minutes until tender but still crunchy. Drain in a colander and leave to cool and dry out.

Heat the oil in a large pan and sauté the onion for 12 minutes on medium heat until soft and starting to brown. Add the cooked carrots and all the remaining ingredients, apart from the cilantro and yogurt. Mix well. Remove from heat. Season with salt, stir, and leave to cool.

Before serving, stir in the cilantro, and adjust the seasoning if necessary. Serve with a dollop of yogurt or, to keep it vegan, drizzle with olive oil. Garnish with a little more cilantro.

Below is Wolfgang Laib’s installation at MoMA which just ended on Monday: hazelnut pollen in the main atrium. Beautiful, meditative, and beckoning spring.

IMG_3049

IMG_3096

You should really make these tomorrow morning. Wake up a little early, and sneak out of bed gently, quietly, without disturbing your loved one asleep next to you. You can grab the paper from your stoop and brew some coffee. (The paper’s particularly heavy this weekend—there’s a five-pound T style magazine.) Then in fifteen minutes throw together these buttery, not-too-sweet scones from Rose Bakery, and twenty minutes later pull them hot out of the oven. You will be loved.

I can’t count how many times I’ve made these scones from Rose Carrarini—owner of the popular bakery in Montmartre, Paris—since the cookbook Breakfast Lunch Tea came out in 2006, the first year I started working at Phaidon. I’ve tweaked the recipe over the years and most recently made these with chopped walnuts, pecans, and apricots. There would’ve been currants in this last batch too, had I not forgotten to add them at the last minute.

One thing I love about these scones—well, two actually—is not only are they so fast to prepare but they use one of my favorite ingredients, maple syrup, as the sweetener. I was in Vermont recently and refilled my stash, using it in my Brooklyn kitchen to sweeten everything from oatmeal to hot chocolate to scones.

You can play around with this recipe, leaving out the nuts, substituting walnuts with pecans, adding apricots or currants. I think pine nuts and apricots might be a nice combination too.

IMG_3099

Maple Walnut Scones
Makes 10 scones

2 1/4 c flour (you can use a combination of all-purpose, whole wheat etc.)
1/2 c rolled oats
1 heaping tbsp baking powder
1 tbsp sugar
1/2 tsp salt
3/4 c (1 1/2 sticks) cold, unsalted butter, cut into small cubes
4 tbsp maple syrup
4 tbsp milk
1/2 c nuts and dried fruit of your choice, optional (walnuts, pecans, currants, apricots, etc.)
1 egg, beaten

Preheat the oven to 400 F and grease a baking sheet with butter.

Sift the flour into a large bowl and stir in the oats, baking powder, sugar, and salt.

Add the butter to the bowl and using your fingers work it into the dry ingredients, until the dough resembles breadcrumbs.

In a separate, small bowl combine the milk and maple syrup. Make a well in the middle of the dough and pour in the milk-syrup mixture. Use a fork to mix it into the dry ingredients, then your hands to combine. Fold in the nuts and/or dried fruits if using. Do not over mix. If it is too dry add a little more milk, and if it is too wet add a little more flour.

Pat the dough out onto a lightly floured surface until it is about 1 1/4 inches thick. And using a round glass or 2-inch cutter, cut the dough into rounds and transfer to the greased baking sheet.

Glaze the tops with the beaten egg and bake for about 20 minutes or until golden brown.

Serve warm with your favorite jam.

These beautiful roses are courtesy of my housemate’s father, Toby. Happy Valentine’s Day.

IMG_3103

IMG_2894

Happy 2013 folks!

I have that U2 song “Lemon” stuck in my head, from the band’s 1993 album Zooropa. Well, I’m sorry to be the one to tell you this, but that was twenty years ago. We’re old. And we misspent our youth.

Ok so much updating is in order. It’s been six weeks since my last post—the longest dry spell since I started this blog almost two years ago. What happened? December holiday madness. Office parties. Book deadlines. Dating. Etc. And then, on December 22nd, I suffered a concussion after fainting in the Whitney Museum, crashing hard on Marcel Breuer’s concrete floor, my head breaking my fall. I was at the Wade Guyton show on the third floor, which you should go see if you’re in New York, it comes down on Sunday. Go for the Guyton, stay for the Artschwager.

I’ve been largely out of commission for the past two and a half weeks. Not cooking, not biking, not yoga’ing, not working. For Christmas I received two copies of Yotam Ottolenghi’s new cookbook Jerusalem. One from my sister Hope, the other from the b.f. Melony. I’m exchanging one of them for Plenty, since I miss having Mark’s copy around.

So while I haven’t been at the stove, I’ve been curled up in bed with the beautiful book designed by Sarah Pulver (cover for U.S. edition) and Here Design (interior and cover for UK edition), dreaming of shakshuka, mejadra, and eggplant everything. But I thought I’d take it slow and begin my re-entry with something not too labor intensive but with big results: preserved lemons. On the few occasions I’ve had the store-bought kind in a jar I’ve enjoyed the fragrant sweet-sour tastes with couscous, bulgur, fish, lentils, meat. But never having made my own, it seemed about time to dive in.

This is also strategic: I plan to cook my way through this book over the coming months and having these luscious preserved lemons on hand four weeks from now will come in handy for multiple recipes.

Now, a head’s up: you make these lemons in stages. So first you stuff with salt and keep them sealed in a mason jar for a week. Then at that point you open the jar and stuff them with rosemary, chile, lemon juice, and olive oil, then let sit again for at least four weeks. I just began step one, but couldn’t wait to post about it. So I haven’t even added the rosemary, etc. yet. I’ll update here when that happens in about a week’s time.

IMG_2898

Preserved Lemons

6 organic, unwaxed lemons
6 tbsp coarse sea salt
2 rosemary sprigs
1 large red chile
juice of 6 lemons
olive oil

Make sure you have a Ball or Mason jar large enough to accommodate your lemons. Sterilize it by filling with boiling water, leaving for a minute, then emptying. Let it air dry.

Wash the lemons and cut a deep X or cross down through the lemon, leaving about 3/4 in. from the bottom. Stuff each lemon with 1 tbsp of the salt and place in the jar. Push the lemons in tightly, seal the jar, and leave in a cool place for at least one week. If you don’t know how to seal a jar properly, here is one of many links that explains how to do this.

IMG_2902

After this initial period, remove the lid and press the lemons as hard as you can to squeeze out as much of the juice as possible. Add the rosemary, chile, and lemon juice, and coat the lemons with a thin layer of olive oil. Seal the jar again and leave in a cool place for at least 4 weeks. The longer you leave them the better the flavor.

Enjoy these as a condiment to many meat, fish, and vegetable dishes. I’m planning to use mine in the recipe for Chermoula eggplant with bulgur and yogurt, from the same book.

IMG_2907